Managing Your Profile
Change your name, your email address or your profile photo, and why changing your email address locks you out of the site until you verify the new one.
Managing Your Profile
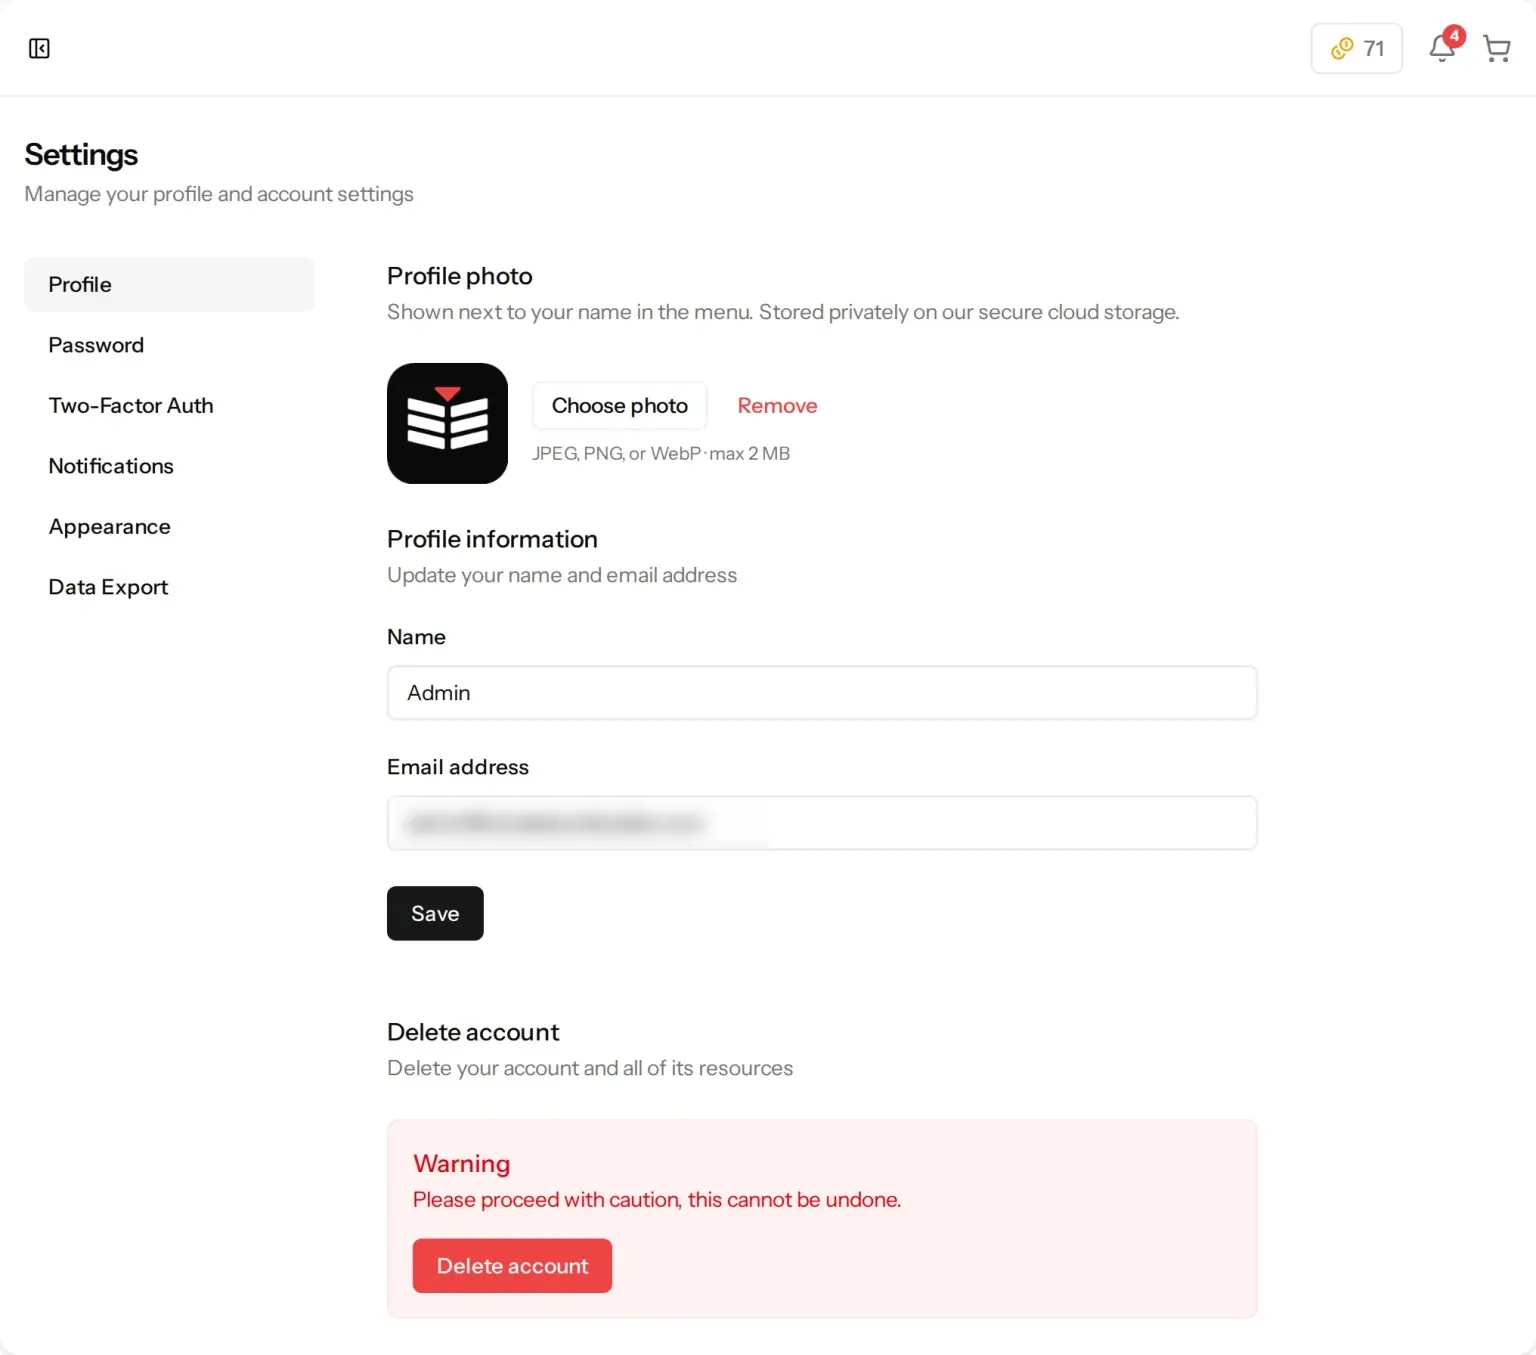
Your name, your email address and your profile photo all live on one page: the Profile tab of your settings.
Finding Your Settings
Click your name in the menu at the bottom of the sidebar and choose Settings. You land on the Profile tab. The other tabs are Password, Two-Factor Auth, Notifications, Appearance and Data Export.
Your Profile Photo
A photo is entirely optional. It is shown next to your name in that same menu and is stored privately; it is not part of your book and it is not shown to other customers. Without one you simply get your initials instead.
- Click Choose photo and pick an image from your device.
- Click Upload.
The file must be a JPEG, PNG or WebP, no larger than 2 MB, and no more than 4096 pixels on either side. That last one trips people up: a photo straight off a modern phone camera can be well inside the size limit and still be too many pixels across, and it is refused. If that happens, crop it or save it at a smaller size and try again. To take a photo down again, click Remove.
Every photo is checked automatically before it is saved. If the check cannot run just then, you are asked to try again in a moment; if the image does not meet our content guidelines, you are asked to choose a different photo. Uploading a replacement always removes the previous one.
Changing Your Name
- Edit the Name field.
- Click Save.
This is the name we put on order confirmations and use when we write to you. It is not the name inside your book — the names in a book come from the questions you answered while making it.
Changing Your Email Address
Changing your email address asks for your password, because your email address is how you sign in.
- Edit the Email address field.
- A Current password box appears as soon as the address differs from the one on file. Type your password in.
- Click Save.
An address can only be used on one account, so if the new address already belongs to an account you will be told it is taken.
What Happens Straight After You Change It
Please read this part first. It surprises people, and it is much easier to plan for than to undo.
The new address always starts out unverified — there is no case where we skip that. Until you verify it, the signed-in parts of the site are out of reach: your settings, My Books, your downloads, the cart and checkout, and the support pages. The moment you save, you are taken to a page headed Verify email and you stay on it.
Getting back in takes one click: on that page, press Resend verification email, then open the link we send to the new address. Everything is exactly where you left it.
So make sure you can actually open the new mailbox first. If you change your address to one you cannot read, you will be locked out of your own account and the only way back is to write to us at support@simplebookbuilder.com, because you will not be able to reach the support pages either.
Your email address is also where your sign-in codes go, unless you have set up an authenticator app instead. Two-Factor Authentication explains how that works and what your recovery codes are for.
Other Things on This Page
Your password is on its own Password tab — see Changing Your Password. Delete account sits at the very bottom of the Profile tab; Deleting Your Account explains exactly what that erases, and is worth reading before you use it.
Still have a question?
Support tickets are part of your account. Log in or create a free account to open one.